Customize HP Quality Center
The real power of this tool, in my opinion, is inside its dynamic part, the Script Editor, that allow the writing of customize code, very close to vbscript, that allow the interaction with modules' objects and actions.
_________________________________________________________________________
How to access to the Script Editor
You can access to the code of the Script Editor through the "Customize..." voice of the menu inside the Project, select the Workflow link. On the Right Part select Script Editor link.

As you can see from the picture there are others links to automatic create functions inside the script editor code. However these functions created from the "Wizard" sometimes don't interact in correct manner and the behavior is not as what you expect. I don't suggest to use this tool because I want to drive the code I implemented.
_________________________________________________________________________
Script Editor Structure
This is the script editor section:
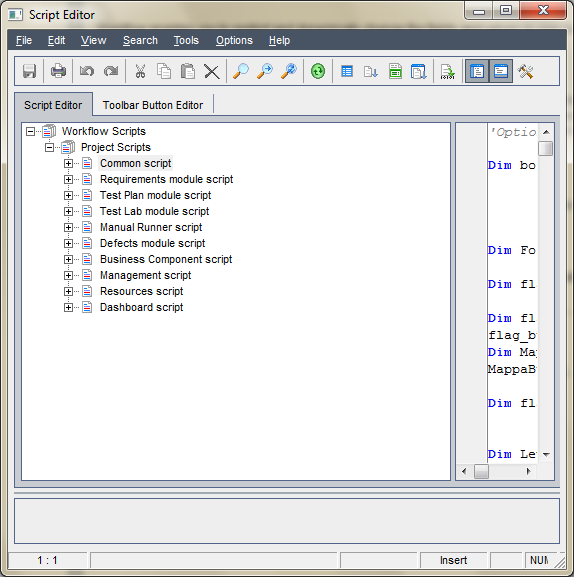
It is an editor, very close to a developer environment, as an IDE. It is composed by a main menù, a toolbar and, very important, 2 tabs. The 1st one is for the code, the 2nd contains the icons to associated to the button to perform customized actions.
Workflow Script
Under the 1st tab there is a Tree Structure that is the QC Modules' Structure: so you can find module about Requirements, Test in TestPlan, TestSets and their Instances, Run, Bugs, etc... There is also a Cross Module that is the Common. Inside it you can define common variables and constants visible from all the module except from the Manual Runner. This module is manage in a particular manner that I explain later in the section "How To - Tips&Tricks".
Note that is present a major level, Project Script. Why? As I don't explain yet there are 2 types of project: Standard Projects and Templates. This last type is used as focal point (father) for others Standard Projects that will be connect to the Template and all the customizations (lists, groups, code, etc...) will inherit from it. Template ScriptEditor Tree has 2 levels: Template Script and Project Script. I will explain better in the next chapter.
______________________________________________________________________
Let's see how the modules are structured.
Common Script
This module contains functions and subs that are not specific for modules but are cross project. It's possibile declare here objects, variables, constants, etc..., available for all modules except, as I said before, the Manual Runner.
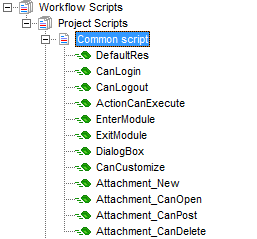
Inside the Common we can find these functions/subs:
- DefaultRes: function that set a boolean value to use as Default Result
- CanLogin: boolean function use to manage Access to the project
- CanLogout: like the CanLogin but during the Exit from the project
- ActionCanExecute: maybe the most important, certainly most accessed function. Boolean Function that returns if an action can be executed.
- EnterModule: Sub called when enter into a Module (this event works also in Manual Runner module).
- ExitModule: as the previous but during the exit
- DialogBox: event called during an open/close of a form (IsOpen = True/False)
- CanCustomize: I've never use it so I don't know exactly how it works.
- Attachment_New: event called when user add an attachment.
- Attachment_CanOpen: boolean function that returns true if user is allowed to open the attachment
- Attachment_CanPost: boolean function that returns true if user is allowed to Post the Attachment
- Attachment_CanDelete: boolean function that returns true if user is allowed to Delete an Attachment.
Others Modules
Functions and Event are common for quite all modules. You must understand the contest they are used.
I try to explain better: when a Creation action of an element (object), such as Requirement or Test, is done the event xxxx_New is called (where xxxx is the object to be created). This event is available inside the reference module. So inside the Requirement Module we can find the Req_New event and in the TestPlan Module the Test_New event.
Let's have a look to the picture below which are these events and what they do. The picture refers to the Management Module that manage lots of object type:
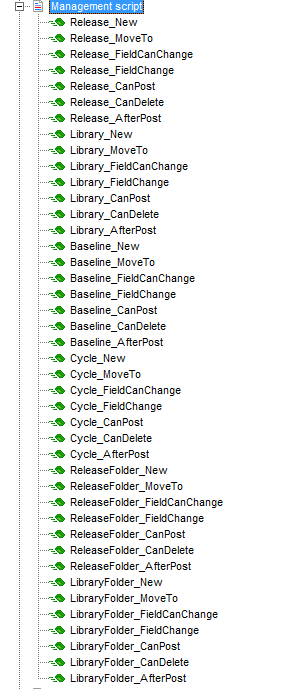
The module manage these objects:
- Release
- Library
- Baseline
- Cycle
- ReleaseFolder
- LibraryFolder
Now let's see which are the events associated to these objects and what they do:
- _New: event called when user performs the action of Creation of a new element.
-
_MoveTo: this event is called when user Select the object.
Warning, this event is not called when the object is moved (Drag&Drop f.e.) from one position to another - _FieldCanChange: boolean function with 2 arguments that are the name of the field and the new value. It returns True if the change of the value can be done, False if not and the value will not change.
- _FieldChange: this sub is called only if _FieldCanChange returns True. The value of the field is already modified from the GUI. This sub is often used to manage the value of a field when a value of another field is modified.
- _CanPost: boolean function that returns True if all the change to the object could be sent to the server and store.
- _CanDelete: boolean function that returns True if the object can be deleted.
- _AfterPost: this event is perform after the changes have been sent to the server and store into the database.
There are also other 2 Sub very useful in Test Plan and Test Lab module that are MoveToSubject and MoveToFolder. Both of them has an object as argument (Subject and Folder) that is the folder object in Test Plan and Test Lab.
Sub and Function Structure
Sub and Function are created to manage errors and cannot fail. This is done using 2 particular statement that are: "On Error Resume Next" and
"On Error Goto 0". Boolean Function have quite always a return to True as default.
For example here I put some sub and function structure
Sub DialogBox(DialogBoxName, IsOpen)
On Error Resume Next
msgbox "Name: " & DialogBoxName & " - IsOpen: " & IsOpen
On Error Goto 0
End Sub
Function ActionCanExecute(ActionName)
On Error Resume Next
msgbox "ActionName: " & ActionName
ActionCanExecute = DefaultRes
On Error Goto 0
End Function
Function DefaultRes
On Error Resume Next
DefaultRes = True
On Error GoTo 0
End Function
______________________________________________________________________
Toolbar Button Editor
Under the 2nd Tab of the script editor you can create new buttons to perform new actions and associated an icon:
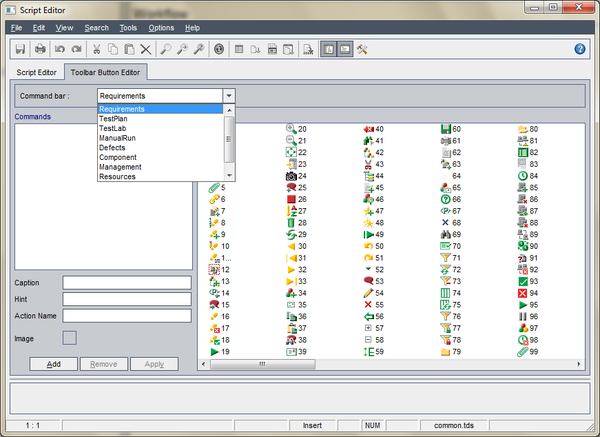
To create a new button you have to select the module where it must appear, give it a Caption, an Hint (the info will be visible during the mouse over) and a name of a Customizing Action. Then you can link one of the icons show on the right part of the screen.
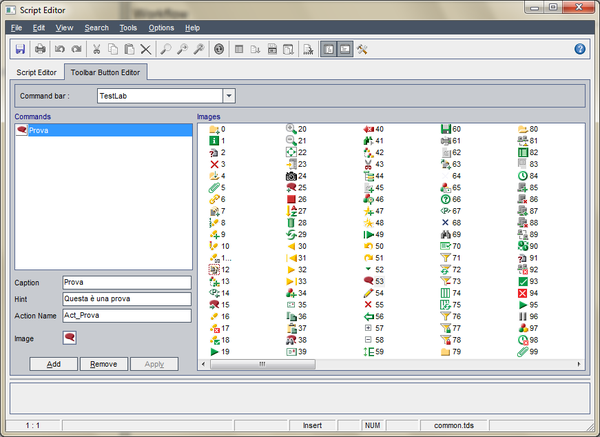
Let's make an example: we'll create a button call "prova" in TestLab module and link the icon number 53. These are the steps to be done:
- Choose the module from the combobox
- Click the "Add" button
- Insert a Caption
- Insert a Hint
- Give the name "Act_Prova" to the Action
- Choose the icon
- Click on Apply
- Save
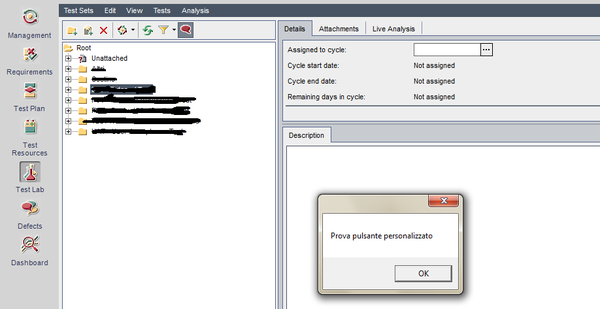
Once the button is created under TestLab Section we have to instruct QC to perform an action when a user click on it. To do this we have to put some code into the ActionCanExecute function because the clicking of the button is an event catch into the ActionCanExecute. Inside the ActionCanExecute we put a msgbox "Prova pulsante personalizzato". This is the result: